Showing posts with label Keyboard. Show all posts

Saturday, December 14, 2019

All New ZX81 : A Minstrel Issue 3 Kit

1 comment
A long time ago in a land far far away Sinclair Research released unto the world a ZX81 kit computer. This is not that kit, this is a brand new Minstrel Issue 3 computer, that happens to be an enhanced reworked ZX81 clone with 32k RAM.

Part Minstrel Review, Part Not

Over the last couple of years Dave Curran of Tynemouth Software has been busy designing and producing modern recreations of Sinclair's early home computer kit, the ZX80. Although in fairness, to call them recreations is probably a disservice. One of the major goals has always been to take the project to the next level and launch a full ZX81 work alike.

This of course is where the Minstrel Issue 3 comes into the picture, it being the first of Dave's fully functional ZX81 clones-ish computers. There are of course some differences, the most obvious being that there is no ULA, or modern equivalent, and the computer is entirely designed around discrete logic IC's . In a world full of FPGAs this refreshing.

To find out more on the inner working of the Minstrel family and the Minstrel 3 in particular Dave has written a number of exceptional blog posts that deserve a good read through.

See a Kit, Build a Minstrel

Kits Done Right: ICs Layed out as per the Minstrel Circuit Board
One of the first things I noticed when opening the kit is just how much thought and care has gone into producing it. From the PCB design to how the IC parts tray was laid out to match the PCB, all the way down to included documentation. First impressions count, and the overall presentation put me in a very good mood before I dared assemble anything.

With 25 ICs, plenty of resistors and capacitors the Minstrel takes some time to put together. While It's certainly no picnic to build, thanks to the layout and documentation it never seemed an insurmountable chore. In the end I managed to construct my kit in 4 reasonable sittings with a similar amount of coffee (coffee being a very accurate measure of time).

Using the Minstrel

After completion comes the power on, will it work will it not work? It didn't, but that was entirely my fault. A quick inspection latter, seems I'd failed to solder exactly one IC pin leg. Power on two, success! Aside from being quite elated at a fully working Minstrel, I was immediately amazed at just how clear the image emanating from it was. Truly the image quality is better than using an emulator, which in the case of a ZX81 style computer is a brilliant thing.

Of course it's not all about image quality. The Minstrel is designed to fit within a standard UK ZX81 case, as such it makes a pretty perfect replacement for a dead ZX81 board. Note that American ZX81 and Timex 1000 cases would require some modification around the video output holes for the board to fit.  

Minstrel Issue 3 Mostly Assembled
If placed inside a ZX81 case the only real clue to it not being a ZX81 would be the swapping out of the mono phono jack power socket for a barrel style one. This is possibly one of the finest moves possible, at least to the user. Going out on a limb here, but in my experience a wobbly phono jack is far more likely to cause an unexpected reset than that legendary RAM pack wobble ever did.

Like the original ZX81, the Minstrel does lack a of a power button. That's not really the Minstrels fault, it's more of a design limitation brought about by ZX81s case design. There are a number of solutions, the easiest is to just go out a buy an external switch from the 'The Future was 8 Bit'. It might be something that Tynemouth could include as an extra option at purchase time.

How Compatible is Compatible

I've not found any software so far that wouldn't work with the Minstrel, I dare say I won't be able to. The little computer is even compatible with a number of newer games and programs that take advantage of hires graphics modes, modes that required hardware modification on an actual ZX81.

Hardware expansions on the other hand may be a little to harder to guarantee due to both the modern design of the Minstrel and the esoteric nature of ZX81 expansions.

I've only a couple of expansion that I can test with the Minstrel, and I don't any 80s period hardware to throw at it. The best news is that the most required modern add-on, the ZXpand works perfectly, indeed Dave Curran in consultation with Charlie Robson the creator of the ZXpand is planning a special edition of the ZXpand specifically for the Minstrel. 

Also of note, the Zeddynet network interface, a card I've had trouble with on some actual ZX81s  work flawlessly. Internet meet Minstrel, a perfectly modern retro way to connect to the world.

Sadly for me one expansion didn't work, my ZX-Keys Expansion card. After speaking to Dave on the matter I have some leads on as to why, I'll have to see what can be done on a revision 2 of my boards. For the moment the ZX-Keys keyboard works perfectly using the Minstrels internal keyboard connector. 

Adding a ZX-Key Keyboard

I have some future plans for my Minstrel involving a custom case and a full sized keyboard. For the moment though I need a working keyboard (There are keyboard options at kit purchase time). As discovered earlier my ZX-Key Expansion card didn't work so I built a temporary adapter board for the ZX-Keyboard.

Internal ZX-Key Keyboard Adaptor
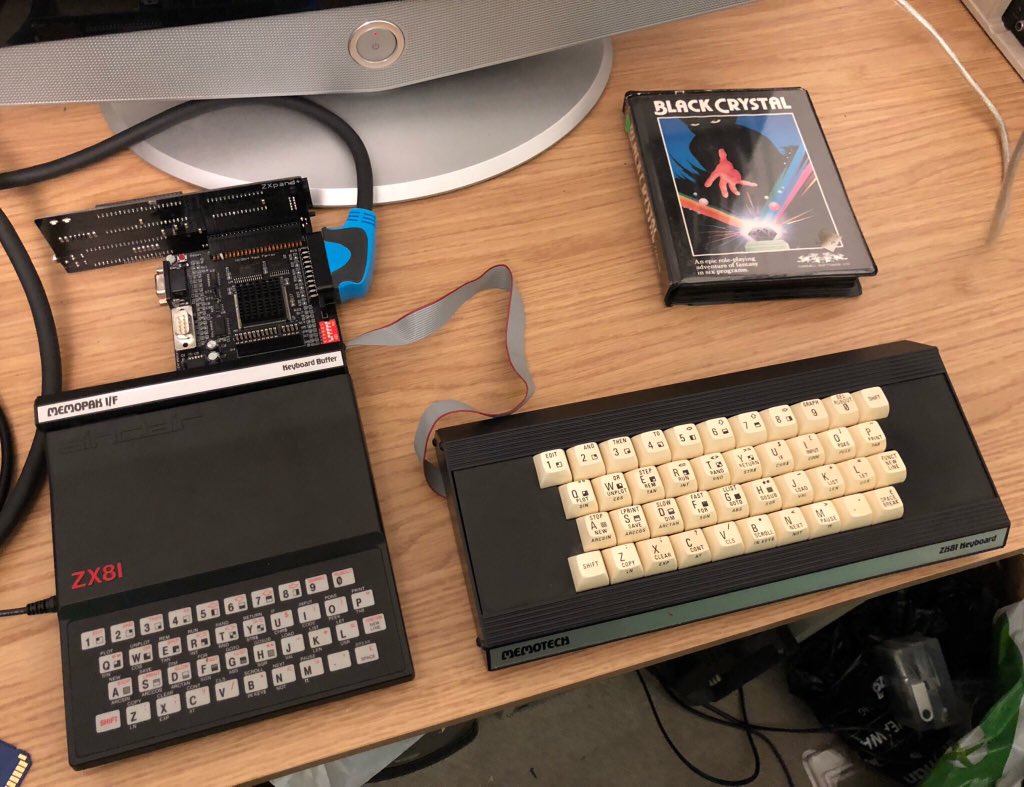
The resulting kludge is a simple wire up job on some protoboard On the Minstrel I soldered on a Female Header Socket Strip to plug it into. Nothing groundbreaking here then. The next step will be to make up a proper PCB board. On the temporary one I've only wired up the bare essentials, the keys. The keyboards LEDs and reset button don't work and it all looks a little messy. Still I do have a nice modern-ish keyboard to use with a nice modern-ish ZX81 clone.

In Summary

I have to say I've been very pleased with the Minstrel kit. It's fun and rewarding to put together and in all honesty it's a much better computer than ZX81. If you enjoy assembling kits then go get one, if you don't know one end of a soldering iron from another Dave supplies them pre-built too.

Now of to play some games, how about a nice game of Tut-Tut?

Minstrel up and running playing a little bit of Tut-Tut

Read More

Sunday, June 30, 2019

UK IBM Model-F XT Keyboard in LINUX

Leave a Comment
UK IBM Model F XT Keyboard and Soarer's Converter

The Model F keyboards produced for IBMs original PC's the 5150 and 5160s don't play nicely with modern computers. Incompatibility is largely due to the changes in the key encoding protocols adopted for AT style PC keyboards. This lack of compatibility has been a real shame as by enlarge the keyboards are mechanically superior to the latter Model M.

Like the Model M, the F's mechanical keys are designed around buckling springs, unlike Model M's however the F series use capacitive PCB's and not rubber membranes to register key travel, leading to a superior if more costly to produce mechanical keyboard.

Of course all this history is largely redundant if you can't actually use a Model F keyboard on today's PC's. Luckily for us with the use of an easy to come by adapter the "XT Keyboard To USB Soarer's Converter" it's quite a simple task getting a 38 year old keyboard up and running without much fuss. If wish to build your own adaptor all the plans and files are available for the Soarer converter on Geekhack.

Having come across a Model F recently, I took the easy option of ordering a pre-made converter. Everything worked brilliantly and I had a perfectly functional keyboard in minutes. Although there was a minor issue with the keyboard layout. Oddly for Australia where we normally have US keyboards, the Model F in my possession has a UK layout this takes a little extra configuration before working just right with LINUX.

UK Keyboard, the Simple Part

The easy part is simply adding a standard UK layout to the existing keyboard configurations. In XFCE this is normally done from Settings/Keyboard. The exact location and nature of the settings tool will vary between XFCE, GNOME or the KDE desktops, but process remains the same. The UK mapping will take care of 95% of out layout changes, however there are 3 keys on the UK layout that do not match with the standard 101 AT layouts. The misbehaving keys are " \ ", " ' " and " # ".


Quick and Dirty Config Change

Ubuntu based LINUX distributions use XKB to configure and drive keyboard layouts. To make lasting changes that will survive all distribution and package upgrades we would need to write configuration files specifically for the Model F keyboard, but there is a quick and dirty hack we can employ. As long as the Model F is your only intended UK keyboard, and we are aware we may need to redo any changes after a package upgrade, we can simple edit the default UK layout file.

First open XBB's keyboard UK symbols file for editing

sudo nano /usr/share/X11/xkb/symbols/gb

Find the default layout, this should be at the top of the file and make the below changes highlighted in red.


default  partial alphanumeric_keys
xkb_symbols "basic" {

    // Describes the differences between a very simple en_US
    // keyboard and a very simple U.K. keyboard layout defined by
    // the SVR4 European Language Supplement and sometimes also
    // known as the IBM 166 layout.
    // Modifications for IBM Model-F Keyboard

    include "latin"

    name[Group1]="English (UK)";

    key  { [         2,   quotedbl,  twosuperior,    oneeighth ] };
    key  { [         3,   sterling, threesuperior,    sterling ] };
    key  { [         4,     dollar,     EuroSign,   onequarter ] };

    key  { [apostrophe,         at, dead_circumflex, dead_caron] };

    // key  { [     grave,    notsign,          bar,          bar ] };
    key  { [    numbersign,     asciitilde,          bar,          bar ] };

    // key  { [numbersign, asciitilde,   dead_grave,   dead_breve ] };
    key  { [ backslash,        bar,       notsign,        brokenbar ] };

    // key  { [ backslash,        bar,          bar,    brokenbar ] };
    key  { [ backslash,   bar,            backslash,      bar ] };

    include "level3(ralt_switch_multikey)"
};


After saving you'll need to log out or reboot the Computer. Once logged back in again the Model F should work like a charm in UK mode. You could even right a blog post with it.


Read More

Wednesday, May 29, 2019

ZX-Key, External Keyboard For ZX81s and Other Micro Computers: Part 5

8 comments
The ZX-Key ZX81 Keyboard in Full Case

The Full Case For ZX-Keys

I've been promising a full keyboard case for the ZX-Keys ZX81 keyboard for a while, now at long last it is (almost) complete. Complete enough that have in my hands a freshly minted case fresh from Shapeways, and it looks gorgeous.

The Full Case builds on the Starter Case covered in the previous blog post, adding the top half and a bottom plate. As mentioned previously only the Starter case is really required, but for some smart good looks the top half is a must have. Of course for the sake of competness a bottom plate may also be attached.

Exploded Viw of the ZX-Keys Case Components
 The top half of the case is really where all the action takes place. The ZX-Keys mode indicator LEDs and reset switch are slightly recessed at the back, with some nice speed lines running either side, lending a retro 80s feel. A small hole is left open to the right of the case allowing a USB lead to be plugged in when using the keyboard with a PC or MAC. At the rear of the case the IDC connectors for serial out and direct connection the ZX-Key expansion interface are nicely flush.

ZX-Key ZX81 Keyboard - REar View
The Rear of the ZX-Keys Keyboard Case, Showing the Flush Mounted IDC Headers.
The whole unit is help together with 3mm diameter case bolts. A 6mm bolt and nut hold the centre of the base plate to the keyboard, all other bolts are 8mm in length and may be screwed firmly into to case holding the unit tightly in place.

ZX-Key ZX81 Keyboard - Side View
Right of the ZX-Keys Keyboard Case, with cutout for micro USB Access.
Attached to the inside of the top case is a sprew containing two Switch Cover components for mounting on the keyboards reset switch. The exact Switch Cover to be fitted on assembly depends on the micro switch found on the ZX-Keys PCB. A hollow stemmed version for use with long barreled micro switchs, or a flat bottom variety if shallow micro switch is in place. The Switch Covers should be placed inside the top shell the before assembly.

ZX-Key ZX81 Keyboard - Under Side View
ZX-Keys Base Plate and Mounting Bolts.
The only real issue I have with the beta case print is with the base plate. I found the plate to be a little flimsy, and it'll need to strengthening it before general release. Notably the grill like pattern on the base will be removed and made solid. Additionally the riser bars along inner sides will be widened to add a little extra rigidity.

The ZX-Key ZX81 Keyboard and Interface Card Connected to a ZX81
My ZX81, pictured with the complete ZX-Key Case and ZX-Keys Interface Card.
The ZX-Keys itself is for sale on Sell My Retro, At the time of writing there is one unit available, never fear more are on their way very soon. The Starter Case can be found on Shapeways., and the Full Case will be made ready for purchase there very soon.

Once I've completed work on the Full Case design a DIY Beginners Case for home 3D printing will also be made avaliable. The Beginners case will be based on the Starter Case design, although it will not be full compatible with the complete case units. All will be announced ASAP.

Update: All Case Parts are now avaliable for order from my Shapeways Shop.


See more entries for this project: Part 1Part 2Part 3Part 4, Part 5

Read More

Sunday, March 10, 2019

ZX-Key, External Keyboard For ZX81s and Other Micro Computers: Part 4

Leave a Comment
Some of you may have noticed that a batch of ZX-Key units went up for sale on Sell My Retro over the weekend. This has been a great achievement and would not have been possible without some much valued help. When I started this project I'd only intended to make a keyboard for myself but soon found a lot support and others desiring a modern mechanical keyboard implementation for 80s micro computers.

To that end I would very much like to thank Spencer Owen of RC2014 fame for his contributions and ZXkim81 for embracing the idea so fully that he's about to test out the first DIY kit version of the ZX-Key.

Now onto some more about the project so far.

Sundry ZX-Key Design Decisions 

This post is primarily centred around some design decisions on the Case for the Keyboard and the Selection of Key Switches.

Mechanical Key Selection

Selecting the right Mechanical switches for the keyboard was a slightly more difficult task than you might imagine; in the end I chose Gateron Yellows, a firm to medium weight linear switch. The reason for this is twofold, and all to do with how the ZX81 registers key presses.

The ZX81 can be somewhat sluggish in registering keystrokes. While this is normally quite fine when entering text with the membrane keyboard, moving to a mechanical keyboard makes this lack of speed somewhat more noticeable. This is the reason behind the use of a linear switch, over a clicky one such as MX Blues. While a real keyboard is far more tactile, the use of a clicky switch would give an undue impression that a ZX81 had actually registered the key press when in reality it hadn't.

Gateron Yellow Keyswitch, the Perfect Match for a ZX81 Keyboard

Related to the above;  the use a firm linear switch adds a certain amount of weight, possibly unconsciously slowing down the natural typing rate, bringing key strokes more into line with what a ZX81 expects. On testing I found Gateron Yellow switches a nice match to requirements, and the main reason for not going with the firmer MX black was in keeping the typing experience pleasant, particularly for people not used to (overly) heavily weighted switches.

A Case to Start

All keyboards need a case of some sort. The trouble here of course is that all bespoke keyboards require a very specific case, one that can end up being quite the expense. For the ZX-Key keyboard case my main goal was to first make it relatively affordable, and secondly I desired a design that could be upgraded over time.

Essentially the Starter case I came up with is more of a keyboard frame than a full case. The ZX-Key keyboard is screwed in place with some 3mm diameter 6mm long case bolts. Provision on the base has been made for standard 12 x 12mm rubber feet to stop the keyboard from sliding around on a table.
The ZX-Key  ZX81 Mechanical Keyboard in Starter Case
The ZX-Key Keyboard Mounted on the Prototype Keyboard 'Starter' Case
Also of note, the case has a gentle 2 degree slope from front to back for an easy typing angle. A higher angle felt a little exaggerated on such a small keyboard.

I've been using the initial prototype for some time now, and have found it provides quite a good level of rigidity. I did make a few errors on the original, mostly around spacing, and in the height of the lip around the keyboard PCB. All issues have been addressed and the fully revised version of the ZX-KEY Keyboard 'Starter' Case has been made  made available on Shapeways.

Bottom of the Prototype Keyboard 'Starter' Case
As alluded to, there will be 2 more case parts designed, a simple backing for underneath the keyboard and a somewhat more elaborate top half styled to suit a Sinclair product. However I felt it important to make these components entirely optional, particularity as larger 3D printed objects can become quite expensive.

Of course the case as a whole is entirely optional, and if you make your own then I would welcome seeing pictures.

Final Production Ready ZX-KEY Keyboard 'Starter' Case as Found on Shapeways

I will be releasing the complete set of case parts to Shapeways in the coming month or so, if you would rather wait for the complete unit.

See more entries for this project: Part 1Part 2Part 3Part 4Part 5


Read More

Thursday, March 07, 2019

ZX-Key, External Keyboard For ZX81s and Other Micro Computers: Part 3

4 comments

The main goals of the ZX-Key project has been to build a mechanical keyboard usable on real ZX81s, PCs (particularly in emulators) and on the RC2014 or other computers with serial keyboard inputs. This entry we'll go over a couple of the details relating specifically to the Keyboard component of the build.

Final prototype ZX-Key ZX81 Keyboard
The ZX-Key Keyboard

The ZX-Key Keyboard

The keyboard layout is based around the 8x5 matrix format found on the Sinclair ZX81 and ZX Spectrums, which makes sense as that's what it's designed to be used with.

The main keyboard circuit is also almost identical to a ZX81s, with the addition of a Arduino Pro Micro enabling the ZX-Key to be used as a regular USB PC keyboard. Connection to the ZX-Key ZX81 expansion interface is facilitated by  a 16 pin IDC header.

Additional diodes have been added to the 5 row lines, these  prevent some issues found when testing the prototype keyboard with a ZXpand expansion card. When the ZXPand read an SD card, its current draw caused some instability with the Arduino. This problem was also addressed on the ZX-Key interface card by proving it with an independent voltage regulator.

A reset line has been brought out from the ZX-Key interface card, and is presented on the 16 IDC header so there is no need to turn the ZX81 off and on to restart the computer. Similarly the 6 pin IDC connector provided for TTL serial communication also provides a reset line broken out for using the keyboard in conjunction with a RC2014 micro.

The pull down 100k Resistor on Column 8 allows the Arduino to detect the presence of a ZX81. As the Arduino powers on or when reset it first tests the status of this column to determine what mode it should start in, either Standard USB / PC or ZX81 mode.

ZX-Key Keyboard Schematic

The Arduino Bit

While connected to a ZX81 the Arduino is essentially dormant, only handling some minor LED visual indicators. However when not connected to a ZX81 the Arduino Pro Micro takes control, turning the keyboard into a fully functional USB HID (device).

In ZX81 mode with the ZX-key interface connected via an IDC ribbon cable, the ZX-Key will behave as a standard ZX81 keyboard, except with a much improved typing experience. When the keyboard is unconnected, plugged in via USB or serial port the keyboard will start in Standard PC mode.

Keyboard modes and selected layers are indicated by a cluster of three LEDs on the right hand side of the keyboard. There are three keyboard Layers, Standard, Emulator and ZX81. You can switch between Standard and Emulator layers by holding down SHIFT, FUNCTION (ENTER), and GRAPHICS (9) key combinations. The Standard layer has 3 main modes and each of these has a SHIFT layer, this gives access 98% of the keys to be found on a normal USB keyboard.

LED States
Layer & Mode Selected
ON
OFF
OFF
STANDARD
OFF
ON
OFF
STANDARD - FUNCTION
OFF
OFF
ON
STANDARD - GRAPHICS
ON
OFF
ON
EMULATOR
ON
ON
ON
ZX81 - INTERFACE CONNECTED
Standard Layers: Keyboard Mode and Function Selection
NormalNormal mode. All keys are in Standard US Keyboard configuration.
SHIFTWhen in Normal Mode: Symbols in Red are selected. Where these red keys are commands, for example 'EDIT or SLOW' they have been replaced by another symbol. All common symbols are present on the keyboard. Note that SHIFT keys effects vary in each of the other modes
SHIFT,FUNCTIONChanges to Function mode. This selects upper case characters. Pressing the SHIFT key in this mode will select symbols as normal.
SHIFT,GRAPHICSAll the number keys are now there equivalent 'Fx' key, ie. '1' becomes 'F1'. All Letter keys become 'CTRL Letter'. Holding down the SHIFT key in Graphics mode changes the letter keys to 'ALT Letter', number keys '1' and '2' become 'F11' & 'F12'.
Emulation Layer: For use with ZX81 or ZX Spectrum Emulators
SHIFT, FUNCTION, GRAPHICSKeyboard will enter the emulation mode. All Standard Layer mode functions are disabled. This allows Emulation packages to detect key presses as using a standard USB / PS2 keyboard.

You can go back to the Standard layers at any point for entering program Emulator menus with 'F' keys for example.
ZX81 Layer: For use with a real ZX81 plugged into the ZX-Key Interface
Auto DetectionThe ZX81 layer is selected automatically if the keyboard is connected to a ZX81 using the ZX-Key Interface. You can't deselect this mode.

Next time: I'll finalise with the 3D printed case, attach the software and more.

See more entries for this project: Part 1Part 2Part 3Part 4Part 5


Read More

Wednesday, February 27, 2019

ZX-Key, External Keyboard For ZX81s and Other Micro Computers: Part 2

3 comments
This blog entry I'll take a quick look into the ZX-Key Expansion interface required to get the ZX-Key Keyboard working with a ZX81.

ZX-Key ZX81 Keyboard Interfacte Card
Final Production ZX-Key Expansion Interface

The ZX-Key Expansion Interface for the ZX81


Primarily the expansion board is based on Wilf Rigters' designs. Changes I've made along the way have been minor, and don't on the whole modify how the original design works. Best refer to Wilfs article for an excellent account and explanation. It's enough to say that there are two 74HC245 ICs that handle the decoding of the ZX81s BUS and afford the implementation of a matrix keyboard.

The modifications I've ended up making to the original design have been necessitated by the desire to use the Keyboard component of the project with ZX81s, the RC2014, (or other mircos) and PCs via USB.

First Iterations

Initially I breadboarded a portion of the circuit for some basic testing, just for a bit of satisfaction. Unsurprisingly that worked perfectly fine, so went ahead and built up a prototype PCB version.

Breadboard Test
For the PCB I added a +5v rail for powering an Arduino Pro Micro which is located on the keyboard PCB and also broke out the ZX81s reset line. In addition diodes used on the row lines have been moved from the Interface to the Keyboard PCB (See the Keyboard Blog Entry - Coming in Part 3).

All seemed to work just fine (after a stupid layout issue and a bit of trace cutting), however on deeper inspections I ran into a major problem when using the popular ZXpand SD card reader in conjunction with the keyboard. The ZXPand would often not read an SD card, or if it did would load corrupted applications or files.

This seemed to be a power related issue, as powering the Arduino Micro via USB instead of through the ZX81 mostly resolved the problem. Removing the Arduino entirely completly solved the issue, with the keyboard working normally. In summary while the decoder interface worked fine, it didn't in combination with the enhanced keyboard.

Testing the ZX-Key Prototype Keyboard and Interface with a ZX81
The First Iteration: Well it seemed to work fine, but a ZXPand looms in the background.

Second Iterations 

To resolve the power problems I added voltage regulator, this takes power from the +9v rail supplying both the interface and the attached keyboard. Additional diodes on the column lines were also added to the keyboard PCB.  Thankfully these changes solved all the niggling issues with the ZXpand.

Due to the additional diodes on the Keyboard increasing the voltage drop, the CMOS 74HC245 ICs were replaced with 74HCT245 ICs, the TTL level equivalents. TTL signals provide an extended logic level voltage range counteracting the voltage drop in the signals coming from the Keyboard.

Interestingly, the changes made to the keyboard and the changes made to the interface both worked independently. So I've managed to solve the problem twice.


ZX-Key Expansion Card Schematic


See more entries for this project: Part 1Part 2Part 3Part 4Part 5


Read More

Wednesday, February 13, 2019

ZX-Key, External Keyboard For ZX81s and Other Micro Computers: Part 1

4 comments

Ever dreamed of a decent external keyboard for your ZX81? Ever thought you needed the perfect keyboard to use with ZX81 emulators on the PC or a Raspberry Pi? Or how about a keyboard to compliment the RC2014 or perhaps another 8bit hobby project? Well I desired all these things in one convenient package, now finally after a little hard graft I have just such a keyboard.

ZX-Key Keyboard Connected to a ZX81 via expansion interface
Near final design of the ZX-Key, the keyboard connected to my ZX81 via expansion card.
Over the next few blog entries I'll attempt to detail the construction of what would become the ZX-Key, a keyboard Designed to be used on multiple projects.

Starting Out

I've been flipping between several small projects recently, and all these have required a keyboard of some sort. I really desired a keyboard that would be usable by all of these builds. Of course you could argue that a USB keyboard would be good enough, but then there is no fun in that at all, plus what would a blog called ZX81 Keyboard Adventures be if the keyboard didn't work with a humble ZX81 as well.

The idea behind the ZX-Key came from two sources. Initial inspiration came from Chris Oregan of The Sausage Factory fame (although for Retro Asylum at the time) and live steam featuring his ZX81 setup which includes an original Memotech Keyboard. I'm not afraid to admit I was quite jealous of Chris's keyboard. Secondly Spencer Owens Universal Micro Keyboard for his RC2014 would from the starting point of the ZX-Keys design.

Chris Oregan's ZX81 with Memotech Keyboard
Spencer designed his RC2014 Micro Keyboard around the layout and configuration of the ZX Spectrums, which by more than coincidence is near identical to that of a ZX81s. With the use of an Arduino Pro Mini his keyboard can be connected to a PC via USB oa TTL Serial to the RC2014. Allowances are also been made for direct connection to a Micro Computer, such as the ZX81.

As I've built a number of USB keyboard interfaces designed to work with Sinclair related keyboards before, including the whole reason for this blog site the AZ15, borrowing from the ideas behind the RC2014s Micro Keyboard seems a natural fit. Talking to Spencer this idea has come a little full circle as we've both taken inspiration from Dave Curran's (Tynemouth Software) projects.

With the basic idea of the keyboard at hand, I needed a way to connect it to a ZX81. For this there are two options, either connect directly into the heart of the machine replacing the existing membrane keyboard, or build an external expansion interface card for ZX81 and keyboard. The cleanest option being the second. I'm certainly not the first person to want a quality external keyboard and therefore not the only person ever to build an expansion card. Back in 2004 Wilf Rigter published the schematic of his ZXKBD v3 ZX81 keyboard expansion and it is this design that would form the core ZX-Key's expansion card.

That about wraps up the starting point of the project, next time I'll take a look into the core of the keyboard, it's layout and some of the choices made for the final design.

Before I move on, here is a quick YouTube video preview into the (near) final product working with both an emulator running on a Raspberry Pi and then connected to a ZX81 via the expansion card.


See more entries for this project: Part 1Part 2Part 3Part 4Part 5


Read More

Saturday, June 30, 2018

A DIY ZX81 Keyboard Period Document

Leave a Comment
Are Looking to build an external ZX81 or Timex 1000 keyboard? Then I have just the 1982(ish) document to get you on your way.

As part of a recent Ebay acquisition of some ZX81 related books I received an additional surprise. Included in the parcel was a rather good period document from the company 'Mule Electronics' which outlines how to attach and build an external keyboard for a Timex 1000/ZX81. As far as I can tell the text originates from the USA, unfortunately there is no further indication of the Companies address or the exact date the document was produced.

Converting Your Sinclair Keyboard: Loose leaf pages from a great little text.
The document 'Converting Your Sinclair Keyboard' provides some still very useful information on exactly how the ZX81s keyboard works and what to look for when building your own external keyboard modifications. Certainly worth a read in conjunction with the other documents out there on the subject.

The documents to good not to share and as such I've uploaded the complete text to the Internet Archive  so go and grab a copy before starting that keyboard project.


Read More

Wednesday, November 01, 2017

RetroChallenge 2017/10: Part 8

Leave a Comment

Keyboards Down on the NEC PC-8401 Challenge.


Sadly it's time to put the keyboard away on the RetroChallenge for October, but not before a quick summary. And did I mention the keyboard yet, it would be remiss to not to.

The PC-8401 has a truly wonderful keyboard, seriously it's a beauty. It seems that particular computer I ended up with has seen very minimal usage. The Alps SKFL series switches are in a fantastic condition, there is no grainy or worn out feel you'd associate with a 40 year old board. The keys themselves are double shot and feel very firm to type on. It would be nice if you could such a keyboard on a laptop today.

Some Closing Thoughts


I think I got to know the PC-PC8401 quite well over the past months activities, with the device proving to be quite a sturdy piece of kit and generally fun to work with. I've still got some more to do though, the big one being the scanning of the remaining manuals for the Internet archive.

Way back at the start I looked what the reviewers has to say on the NEC-PC8401, the major take away criticism being the neglect-ion to include BASIC in ROM. After playing around with the computer over the past month, that point is still a valid one, and hampers the retro usability of the machine, mostly due to memory constraints of adding BASIC to RAM.

Regardless of the above minor issue, the PC-8401 is a fun little device and it'll continue to sit on my desk and or lap for a while to come. I'm looking forward to finding some good uses for it outside the time constraints of the RetroChallenge and I'm certainly going to plan some future projects around it the  PC-840.

That's it for RetroChallange 2017/10, thanks to all involved and particularly to all the other projects, it maks very varied and fun experiance. Now it's back to our regular non-programed blogging experience.


See RetroChallenge IntroPart 1Part_2Part 3Part 4, Part 5Part 6, Part 7, Part 8


Read More

Sunday, October 02, 2016

Arduino Liberates the Recreated ZX Spectrum

Leave a Comment
Following on from the previous posts, in some free time this week, I butchered my ZX81 / AZ15 Arduino keyboard sketch libraries, sliced in some code for a USB host shield and beat an Arduino Leonardo into submission. The end result a fully working Recreated ZX Spectrum keyboard.

As talked about previously, the Recreated Spectrum has two keyboard modes, one for PS2 functionality and one for Emulation. The odd thing here being that in Emulation mode, the Recreated Spectrum is not compatible with the vast majority of Spectrum Emulators (at least at the time of writing). Disregarding this; Emulation or Mode 'A' as it is labeled, is the easiest to target for any external hardware solution used in remapping the Recreated Spectrum's keys in order to provide a Normal Spectrum Emulator experiance. See the previous post for a deeper explanation.

Emulation mode was quite straightforward in it's implementation, being that all keys are registered when pressed or released, if in a slightly odd way. It was a simple matter of matching the codes the Recreated Spectrum passed out on each of these events with the actual keys.

Once Mode 'A' was covered, it was time to move onto Normal / PS2 mode (Mode 'B'). Normally to enter either Mode 'A' or Mode 'B', a slider switch on the keyboard needs to be placed in the correct position. I decided that if using an external device to do the decoding, this mechanism would become problematic. Having already decoded Mode 'A' for usage, adding a simple keyboard selection would be simpler way to manage switching into Mode 'B' or vice versa. As a result, Mode 'A' is permanently set to on, at the back of the Recreated Spectrum, "CAPS SHIFT" + "SYMBOL SHIFT" + "ENTER" now changes modes on the external Arduino Leonardo based solution.

All key-mappings as described in the Recreated Spectrum's manual and Cheat Card remain the same, with the exception of the Windows, and Print Screen Keys which have been left unmapped at this stage.

While I've used a Leonardo and full sized USB host shield initially, there is no reason why a Pro Micro and mini USB host adapter could not be used to do the same thing. In fact one of the next steps could well be to do just that, along with mating the whole arrangement with a Raspberry Pi in a custom Sinclair inspired case.

For those that feel like a little experimentation, feel free to mess around with some hot of the presses Recreated ZX Spectrum Arduino Sketches. I'll be making changes regularly and the latest changes will be on the 'Recreated Spectrum Project Files to Download' page.

Also, make sure you download and install the Arduino USB_Host_Shield_2.0 libraries from Github before compliling the Recreated Spectrum Project Files.


Keyboard in Action

Read More

Saturday, September 24, 2016

It's all in the Modes & Mappings of the Recreated ZX Spectrum Keys

1 comment
As mentioned last post, the keyboard works perfectly in the standard PS2 mode, it's the emulator 'layer' that has usage issues. If you switch to mode A (the emulator layer) on the keyboard, the key presses register anything but what you'd expect. There seemed to be some rather odd mapping going on, leaving the emulator mode a little useless.

There would seem to be 3 ways in which to adjust the Recreated Spectrum for usage with Emulators, other than the designated but pulled Elite variants.
  1. Patch an Emulator, or wait for support to be added. Apparently the some patches exist for the Fuse Emulator, adding compatibility for the Recreated Spectrum. That's no guarantee that other emulators will support it; I'd wager many gradually will, though you never know.
  2. Rip out the existing control board and build up a new version.
  3. Come up with an external hardware solution to adjust the key codes sent back to the host computer.
I guess option 1 would be the easiest, at least from a general user perspective, though unless your favorite emulator is open source, this could take a while. Option 2 is the most problematic, as to replace the board in a non case destroying way would be difficult (not impossible) to achieve. Frankly I don't want to ruin the look of the Recreated Spectrum with a hatchet job. That leaves option 3 as a pretty good alternative.

The PS2 mode would be the logical mode to tap into for signal / code modification, we need to see what the Spectrum keyboard actually sends out across the USB cable. To do this easily I pulled out an Arduino USB host shield to read the key codes are being sent. The results where interesting. Firstly, the standard PS2 layer (Mode B), was sending exactly what would be expected. With all letters and combinations of 'shift' and 'Alt' key presses being sent in a seemingly standard manner. I found one glaring issue that puts a stop to tapping into the PS2 mode however; the keyboard does not send any codes for the combination of "CAPS SHIFT + 9". What this means to those who have not already guessed, is that you can't set the keyboard to graphics mode.

So this leaves us with Mode 'A', the emulator layer. This is where things get interesting. A PS2 style keyboard will normally send codes stating when a key is pressed, and a similar code indicating that a particular key has been released. The codes the Recreated Spectrum is sending in emulator mode do not follow that pattern. Instead, when you press 'q', for example the keyboard sends the code for 'u' being pressed, however on release the keyboard send the code for 'v' being released. There is not a single key that sends just the expected letter. I've mapped the keys in the table below.


The Recreated ZX Spectrums Mode 'A' Key Mapping

KEY 1 2 3 4 5 6 7 8 9 0
PRESS a c e g I k m o q s
RELEASE b d f h j l n p r t
KEY Q W E R T Y U I O P
PRESS u w y A C E G I K M
RELEASE v x z B D F H J L N
KEY A S D F G H J K L ENTER
PRESS O Q S U W Y 0 2 4 6
RELEASE P R T V X Z 1 3 5 7
KEY CAPS SHIFT Z X C V B N M SYM SHIFT SPACE
PRESS 8 < - [ ; , / { ! %
RELEASE 9 > = ] : . ? } $ ^

As can be seen from the table, the key code order is layed out in a very neat and predictable manner. Also crucially, all key presses are detected in emulator mode, there are no dead keys combination problems such as in the "CAPS SHIFT + 9" issue discovered in PS2 mode. This all makes adding a man in the middle hardware solution relatively easy to implement.

The next step is to write some Arduino code to see just what we can achieve.

Read More