Sunday, November 29, 2020

ZX-Key: New Lite Version

1 comment

Introducing the new ZX-Key Lite: A mechanical keyboard for the ZX81 that's very similar to the classic ZX-Key.


The original ZX-Key has been available for some time now, and won't be going away anytime soon. However various requests have come my way asking about kit versions, versions that don't really need the Arduino for PC connectivity and similar, the Lite version should be the answer to many of these needs.


The ZX-Key Lite, ready for use with a ZX81

Fundamentally there are only very minor differences between the PCB of the Lite and Original; what changes there are afford the ability to provide options for selling differing levels of kits, or provide assembled units designed purely for use with a ZX81.


The most noticeable difference between the Lite and Classic ZX-Keys is the now optional Arduino Pro Micro. (In reality the Pro Micro was an option on the Classic boards as well, however the LEDS in particular then have zero purpose without modification.) The presence of an Arduino allows the keyboard to be used with a regular PC, a function mainly intended for use in emulators. A great feature that isn't required if you're only intending to use the keyboard with a real ZX81.


ZX-Key Lite: Complete Unit fit for a ZX81

The ZX-Key Lite version can always be updated to a Full /  Classic at a latter stage by installing the missing components and switching a jumper wire. The new board is more about providing choices, more than a fundamental redesign.


ZX-Key Lite: Board Upgraded to Classic and attached to a Minstrel ZX81 Clone

Housing the ZX-Key Lite Keyboard in an attractive case is just as simple as previously. There are 3 components available on Shapeways

  1. ZX-KEY Keyboard 'Starter' Case
  2. ZX-KEY Keyboard Case 'Top Plate' - Lite Version
  3. ZX-KEY Keyboard Case 'Bottom Plate'

The starter case and bottom plate are the same parts as used for the Full / Classic ZX-Keys. A 'Top-Plate' - Lite Version has been designed specifically to house a non upgraded ZX-Key Lite, and comes without the redundant Serial Expansion slot and now un-required extra LED indicator holes.


ZX-Keys Lite Case Top Available at Shapeways

Limited stocks of the ZX-Keys Lite are now available at Sell My Retro. It's predicted that kit versions will be available early in the new year, after supply chains and shipping times have returned to some normality.


Read More

Sunday, September 06, 2020

Commodore Educator 64 Mini: Part 3

4 comments
Here we are at the final article in the Commodore Educator 64 Mini series and there are a surprising number of loose ends to tie off; very probably the reason why it's taken a while to actually get around to documenting them.

This article more or less sums things up and provides some instruction on how get the project up and running. If you haven't read Part 1 or Part 2, I'd suggest starting from the beginning so that it all makes sense.

All files required to build the Educator Mini are made available at the end of the post.

The Final Producst
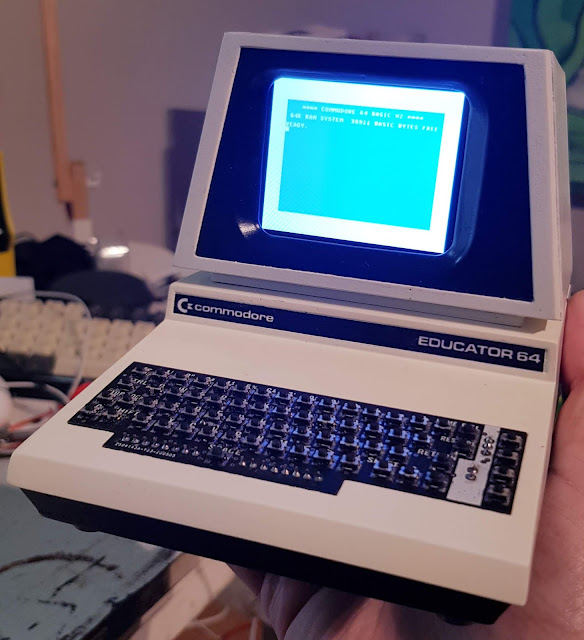
The Final Product: The Commodore Educator 64 Mini

Fitting the Keyboard and Daughter Board

The keyboard is designed to sit quite firmly in the Educator case, it shouldn't require any glue but you may need to file and / or sand the 3D printed case lightly to gain that perfect fit.

The Raspberry PI Daughter Board and monitor cables should be fitted before placing the Raspberry Pi in it's Educator case, as there is not a lot of height to play with right up the back. Cabling running to the keyboard can be inserted at any time.


Raspberry Pi Daughter Board
Educator Min Keyboard to Raspberry Pi Daughter Board / Interface

When fitting the keyboard you need to pay attention to the labels at the header pins. The numbers and letters correspond with a similar arrangement found on the PI Daughter Board. As a plus, the naming scheme also matches that used on a real 64 keyboard.


Keyboard Fitted / back view
Commodore 64 Mini Keyboard fitted Snuggly: Pay attention to the jumper setting.

In addition there is a jumper setting to be made, for use in the Mini. A Jumper should be set across pins 1 & 2. The Jumper determines the behaviour of the Shift Lock key, unfortunately there are not enough free GIPO pins on the PI to take advantage of this feature for now.


The Educator Internals
Inside the Educator MIni

Finalising Model Styling

You'd have noticed by now that the Educator Mini 64 has a somewhat different set of stickers to Lorenzo's PET (much like the real thing really). I've made up a couple of additional mini replica decals to suit the 64, the most obvious of these being the BASIC reference panel.

The BASIC keyword panel is a fairly good approximation the original full sized version and depending on how good your eyes are and the resolution of the printers used to produce the decal sheet could well come in useful.

I've also included Lorenzo's decals for the back of the monitor and the Serial Number Name Plate for the sake of completeness.

Educator 64 Mini Decal Sheet, Including everything an old computer needs.

Getting the Educator Mini up and Running

RetroPie is normally your friend for an easy Linux retro solution. Disclaimer time, I decided not to use RetroPie for this build and went with a standard versions of Raspberry Pi OS (previously called Raspbian).

There are a number of reasons I'm using Raspbian, the main ones for me being,
  1. It's just simpler to get the keyboard working with the Vice emulator.
  2. I'm only intending to use Vice and Commodore Emulation on the Mini.
Of course your needs may vary, and what ever I've done is really only a suggestion.

Installing the Vice Emulator

Raspberry Pi OS does not include the Vice Emulator as a standard package, or even an optional downloadable package, so you'll need to install it manually. I simply followed the Installation guide on krystof.io 

Once Vice is installed you'll be wanting to add a configuration file to get the emulator looking and feeling right.

Run the following commands to create a sdl-vicerc config file:
mkdir -p ~/.config/vice
nano ~/.config/vice/sdl-vicerc
[C64SC]
MenuKey=293
MenuKeyUp=273
MenuKeyDown=274
MenuKeyLeft=276
MenuKeyRight=275
MenuKeyPageUp=280
MenuKeyPageDown=281
MenuKeyHome=278
MenuKeyEnd=279
WarpMode=0
Sound=1
SoundDeviceName="sdl"
SoundSampleRate=8000
SoundBufferSize=100
SoundFragmentSize=0
SoundVolume=100
SoundOutput=1
AspectRatio="1.000000"
SDLCustomWidth=480
SDLCustomHeight=320
SDLWindowWidth=480
SDLWindowHeight=320
SDLGLAspectMode=0
VirtualDevices=1
IECReset=1
CIA1Model=0
CIA2Model=0
VICIIVideoCache=1
VICIIDoubleScan=0
VICIIDoubleSize=0
VICIIFilter=0
VICIIModel=0
SidEngine=0
SidModel=0
JoyPort4Device=0
JoyDevice1=4
JoyDevice2=4
AutostartBasicLoad=1
AutostartPrgMode=0
DriveSoundEmulation=0
Drive8Type=1571
GlueLogic=0
ETHERNETCARTBase=56832
Acia1Base=56832
AutostartWarp=1
KeyboardMapping=1

Setting Up the keyboard

There are multiple was to of configuring a keyboard for use with the vice Emulator, I've chosen the path of least resistance. Feel free to delve deeper into the heavy customisation that Vice affords. That said intense configuring is a little above what's really required for what is essentially a very cute desk toy.

For the initial steps, we'll basically be following those documented in PJ Evens's MagPi issue 67 article on page 26, make some changes specifically for the Commodore Educator 64 keyboard.

1) install Libsuinput: From your home directory:
cd
sudo apt install get libudev-dev python-dev python-pip
sudo pip install wiringpi
cd git clone github.com/tuomasjjrasanen/libsuinput
cd libsuinput
./autogen
./configure
make
sudo make install
Add the following line to /etc/modules-load.d/modules.conf
uinput

2) Install Python-uinput: From your home directory:
cd
git clone github.com/
tuomasjjrasanen/pythonuinput
cd python-uinput
sudo python setup.py build
sudo python setup.py install

3) Install cbmscanner python scripts:  Download these scripts and uncompress the file. We'll mimic the original Magi Article and install them in a subdirectory off the home dir.
cd
wget  -P ~ "http://dasteph.com/cgi/pet/files/cbmscanner.tar"
tar -xvf cbmscanner.tar

4) Create a new Service: We need to setup a new service to run keyboard scanner on boot by creating a new config file.
sudo nano /usr/lib/systemd/cbmscanner.service
[Unit]
Description=Commodore 64 Keyboard Scanner
After=multi-user.target
 
[Service]
Type=simple
ExecStart=/usr/bin/python /home/pi/cbmscanner/cbmscanner.py
Restart=on-abort
 
[Install]
WantedBy=multi-user.target
sudo systemctl enable /usr/lib/systemd/cbmscanner.service

5) Configure Keyboard Layout: Edit the keyboard file and ensure we're setup for a US keyboard layout.
sudo nano /etc/default/keyboard
# KEYBOARD CONFIGURATION FILE
# Consult the keyboard(5) manual page.
 
XKBMODEL="pc105"
XKBLAYOUT="us"
XKBVARIANT=""
XKBOPTIONS=""
 
BACKSPACE="guess"
We can the reboot the Raspberry Pi, the keyboard should then work as intended.


All the Educator 64 Files to Download

Please be sure to refer back to the official  Commodore PET Mini site for the full build details and project history not covered in this series of blog articles.


See all entries for this project:  Part 1Part 2 and Part 3


Read More

Tuesday, June 09, 2020

Commodore Educator 64 Mini: Part 2

Leave a Comment
When I embarked on the Educator 64 journey I had no idea this would end up being my particular quarantine pass time. Who would have thought being stuck at home would be so useful.

So where are we up to? By the end of Part 1 I'd covered the printing of the Educator 64 Mini Case and very briefly mentioned sending a keyboard PCB of for manufacturing. This time around I'll get into the design of the keyboard and detail some additional modifications I've made to Lorenzo Herreras' Commodore PET Mini.


Mini Keyboards for Tiny LCDs

On the whole I've not diverted much from the general design of the Commodore PET MINI. The main inclusion is that of the working keyboard, I did however choose to make things slightly easier where possible in other respects.

As I was going to be ordering a PCB for the keyboard I decided I might as well design an extra PCB that would plug into the back of the LCD panel. Lorenzo's PET screen design has you dissecting a ribbon cable, then hand wiring the various bits to the back of the the Waveshare LCD screen. To much effort I thought, a nice little PCB would save all that hand rerouting trouble. I also thought mounting a reassuring yellow glowing LED at the back night add some CRT realism (or not, turned out you can't really see it once installed, oh well).

LCD Mounting PCB

I addition to the LCD mounting PCB I took the opportunity to deign and order a Pi Zero sized prototyping board which extended the pin header out and added had just enough space to the end of the board for some diodes and the like. The board was a bit of an after thought, although as it turned out I needed it.

Keyboard Design

There's no shortage of people out there hacking old Commodore 64s and making them work with modern equipment. One of the largest set of modifications to dead 64s is in the re-purposing of their keyboards for use with emulators.

To this end the schematics for the 64s keyboard are well know and have been pretty convincingly documented by Simon Inns on his page Waiting for Friday. Simon interestingly points out that the official Commodore Keyboard Schematic is wrong; that certainly spared me some confusion as not having a 64 myself I had nothing else to go by other than the published designs.

Commodore Educator 64 Mini Keyboard Circuit 

I made one minor change to the keyboard schematic; the inclusion of a jumper allowing the SHIFT LOCK key to be placed on the same Column as the Restore Key,  or in its normal state as an extra LEFT SHIFT key. On a Commodore 64 keyboard the SHIFT LOCK actually locks in place if pressed, this functionality isn't possible with the TAC switches I planned on using, so I opened the option to simulate that behaviour in software latter (This option wasn't to be, read on). 

With a known working layout for a Commodore keyboard to hand, all that need to be done was getting all to fit onto a 105x38mm PCB. As mentioned in Part 1 I'd found the perfectly sized switch in the KMR431G which has a footprint of 4.2mm x 2.8mm. The resulting layout mimics the design of a full sized Commodore keyboard. As there are to be no keycaps, Legends are printed on the PCB, some additional PCB styling gives the impression of a full space bar and a silk screened separator between the main keyboard and function keys implies the existence of the metal or plastic case shroud.

The Commodore Educator 64 Mini Keyboard PCB

Reading the Keyboard

My initial plan was to use an Arduino Proc Micro acting in HID mode for decoding the keyboard inputs and passing key presses onto the Pi. The other option I'd considered was procuring a Commodore USB Keyboard Kit from Tynemouth Software. Both of these methods required a spare USB port on the Raspberry PI, being that by this time I'd decided to us a Pi 3A+ for the project (which only has one port) I really didn't have a USB port to spare, particularly if I need to connect another device such as a joystick.

A long time ago for the AZ15 build I'd considered connecting a ZX81 matrix keyboard directly to a Pi, but thought the method a little to cumbersome and unreliable. What I couldn't find at the time was a good way of sending key presses back to the LINUX kernel, sure you could detect a keypad, but only in the active program doing the decoding, not much use for emulators. Fortunately time passes and things get developed and now there are off the shelf solutions.

Enter an article in The MagPi Page 25 by PJ Evans, where he describes, and provides many of the necessities required for reading a ZX Spectrum Keyboard directly, then injecting those key presses back into the LINUX kernel. This Sounded just the ticket for the Commodore Educator keyboard, All that's needed are some software libraries, libsuinput for handling the kernel injection, and wiringpi to run some keyboard scanning code. The only possible road block being the availability of enough free GPIO ports to handle the Commodore Keyboard.

Mapping Raspberry Pi GPIO pins to the Waveshare LCD and C64 Keyboard

At a minimum we need 17 free GPIO ports to read the c64 keyboard (without worrying about multiplexing), 8 Data lines, 8 Address lines and 1 for detecting the RESTORE key. In reality I has hoping for 18 spare GPIO pins so we could enable SHIFT LOCKing. After consulting the Waveshare LCD manual it appeared all requirements could be met, but appearances can be deceptive.

Out of 28 GPIO pins the LCD panel uses 8, leaving 20 pins. Not so fast, GPIO23 is taken when using analogue audio (which we need) and on testing I also found GPIO27 and GPIO22 also seemed to be in use by the LCD panel. That left 17 ports. However GPIO14 & 15 are used as serial lines, that's now down to 15 ports. Fortunately serial can be disabled in the /boot/config.txt file. Phew, we have just enough ports free without having to stuff around with multiplexing.

The rather messy prototyping Board full of Diodes

To get things moving along I wired up my prototyping PCB much as documented in The MagPi article, I adjusting the data and address lines (see earlier image above). I then downloaded the required zxscanner code by PJ Evens, modifying sufficiently to accommodate the C64 keyboard, the result a working keyboard.

Testing the tiny Commodore 64 Keyboard

That is of course just the start, I still need to go back though the zxscanner code and turn it into c64scanner code. As it stands zxscanner is just that, it's geared towards ZX Spectrum emulators, Commodore emulators such as Vice take a somewhat different path when mapping keys from PC-like keyboards and that is something we can tackle in Part 3.

Commodore Pet Mini
C64 Keyboard Installed and some final Decals Added to the Case

Until the next article here's a quick preview of the keyboard in action:


See all entries for this project:  Part 1Part 2 and Part 3


Read More

Saturday, May 30, 2020

Commodore Educator 64 Mini: Part 1

1 comment
What do you do with a new 3D printer, a governmental advised quarantine stay at home order and the freely available plans for a Commodore PET Mini build? Why build a Commodore Educator 64 with a functional keyboard of course.

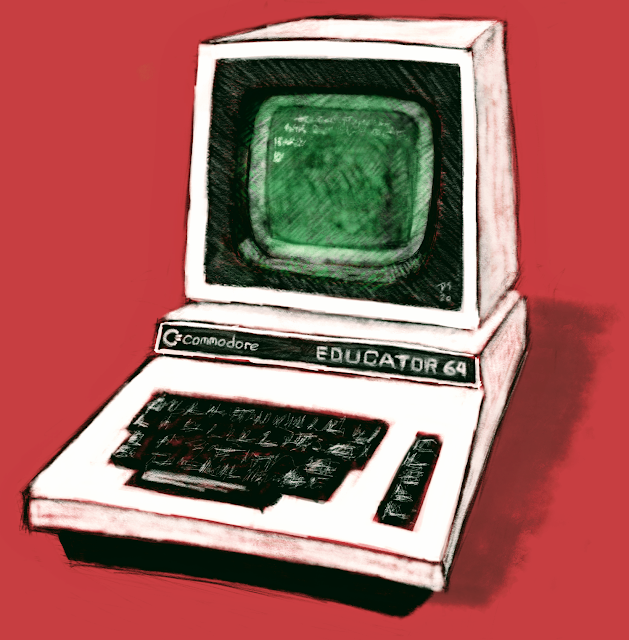
Commodore Educator 64 - drawing by David A Stephenson 2020

Printing your own PETs.

A  little over a year ago Lorenzo Herrera launched the Commodore Pet Mini on the world, a very cute miniature PET model 8032 housing a Raspberry Pi. Nicely he also included all the 3D models and a full material list so you could build your own (and a lot of people have). 

This all looked like a really fun project, the only problem being I didn't have 3D printer.  Then quite unexpectedly and just before the world locked down the family presented me a with a Flash Forge Finder 3D printer for my birthday. Thanks Family!

And so the initial stage of building a PET (soon to become an Educator 64) Mini began in earnest.

The Making of a Model

While the PET mini is quite the functional beauty as is, what with its Pi core, tiny LCD screen and USB ports, it does almost criminally lack the most important part of an early home / office / school computer, a functional keyboard.

Before going to far along the process of 3D printing I first need to know if I could get a keyboard to fit into the PET Mini. I managed to find some very diminutive KMR431G surface mount TAC switches on Element 14, tiny but not tiny enough to build a full PET keyboard.

The KMR431G switches would just squeeze in nicely when arranged in a 64 style. As luck would have it the Case design of the PET 8032 (and Lorenzo's 3D model) is near identical to that of a Educator 64. For those that don't know, an Educator 64 is basically a Commodore 64 in a PET case sold primarily to schools; possibly making it the best 80s game playing school computer ever.

Educator 64 Mini Keyboard PCB

I'll cover the full details of the keyboard and how it's intended to work in Part 2: For now though I laid out a PCB that followed the C64 key mappings and sent it off for Fabrication. The important part being that I now had the measurements required to adjust the top half of the PET case to fit the keyboard. 

Case Adjustments to be Made

To fit the keyboard into the Mini I simply cutout the keyboard space from the original model and designed a shelf for the new keyboard PCB to sit on. Additionally I removed the magnet clips which would normally be located under a printed keyboard and replaced these with clips located on either side of the modified case design.

Lorenzo provides bottom case templates for Raspberry Pi 2/3's and for the 4. I had a Pi 3A on hand and further modified the lower case to fit that in place. The shorter Pi 3A board would came in handy later when cramming many additional keyboard wires into the case. 

Exploded View of the Commodore Educator 64 Mini Case.

Unfortunately the cases main top and bottom sections proved slightly too large for my printer. So I broke these down into separate components with some additional tabs put in place to make gluing them together convenient  and providing some structural strength. I also decided to divide the monitor stand into a bottom an top piece facilitating slightly easier 3D printing and finishing.


The other large-ish change I made to the original model was in redesigning the monitor frame, that part holding the LCD panel. This I made this slightly wider and a little less ovaloid in keeping with the source material. The clasp holding the monitor in place I also reduced in size considerably, minimising the likelihood of snapping an LCD panel accidentally. 

Printing and Finishing the Model

With all the adjustments made the model printed out quite easily. Finishing the the plastics took a little extra effort.

From other modelling activities I had a set of small files and sandpaper which went to good use. Quite a lot of time went into smoothing of the rougher areas and obvious layering from the 3D printing process. I wasn't intent on removing all traces of the printing technique, the model should reflect the process at least to some extent. 

Once sanded down and finished, the little Educator 64  parts were spray painted with a couple of colour combinations. The white panels being a mix of Tamiya TS-26 Pure White for the under layers and TS-7 Racing White for the finishing coats, lending a nice retro feel as the Racing White is slightly creamy in colour.

The black areas of the model were first painted in Citadel Lead Belcher, although any steel or silvery colour would be just as fine (It just happened to be the colour I had available).  The top coat is a Tamiya TS-6 Matt Black, applied relatively lightly, just enough to appear black while allowing the metallic undercoat to maintain some presence. All the components were then sealed with a Satin Spray varnish. The end result being really quite pleasing.

Commodore Educator 64 Mini based on the Commodore Pet Mini

Next Time: The Electronics

The Educator 64 fits together much as the PET mini. The major electronic components are pretty much listed at commodorepetmini.com. In Part 2 I'll attempt to go over how the keyboard is configured and how it works in conjunction with the original PET design.


See all entries for this project:  Part 1, Part 2 and Part 3

 
Read More

Tuesday, May 12, 2020

TuT-TuT on the Jupiter Ace: Part 2

Leave a Comment
Welcome to the second and final article on Porting the ZX81 and ZX Spectrum Game Tut-Tut to the Jupiter Ace:  This time George Beckett takes us through the gritty details of programming in Forth, leaving few treasures undiscovered in the process.

If you missed Part 1, be sure to read up before continuing below.
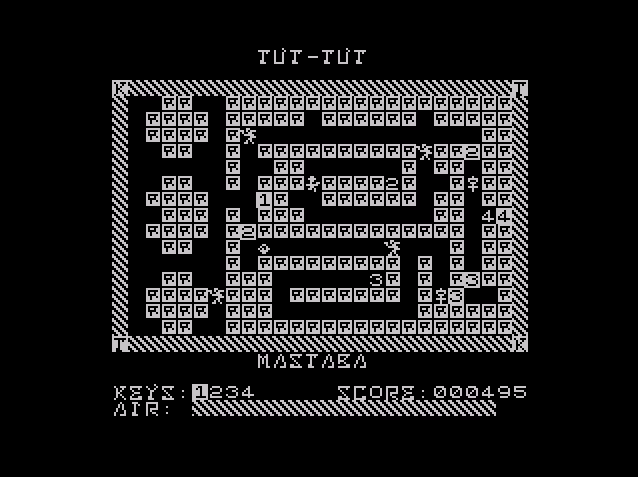
Jupiter Ace Game: TuT-TuT
Archaeology is just as fun in the Jupiter Ace version of TuT-TuT

The Forth Tut-Tut is Ace

Previously, I told you a little about what motivated me to port Tut-tut to the Ace and promised to describe how the game is written. However, before we get on to the game, I should explain a bit about the Forth language, which was developed in the late 1960s for the control system of a telescope. Since then, its scope has grown, being used for a range of scientific and other serious applications in the 1980s and 90s. Even today, Forth lives on and can be found at the heart of various embedded systems.

The basis of any Forth system is a dictionary of words that encapsulate the functions of the machine. There are simple words for manipulating data (bytes of memory) or performing rudimentary arithmetic, as well as more complex words for printing on the screen, making sound, and saving or loading files. The programmer combines these words together to make new words, continuing to build up the functionality until the final program is represented by one top-level word. In that way, writing a Forth program is a bottom-up process, starting at the lowest-level elements and working up. In contrast, the design of a Forth program is a top-down process. You iteratively break the program’s function down into smaller and smaller elements until you reach the level of the built-in words.

The overall structure of Tut-tut is relatively simple, with the player completing a sequence of levels, which involves collecting objects, unlocking doors, dodging mummies and finding the exit. The bulk of the logic is in how each level plays: how the player navigates the maze, collects objects and is chased by the mummies.

In Rabbit Run, the core of the game was a loop in which the player first had the opportunity to make their move and then each possible outcome was tested for—in that case, eating carrots, falling down mole holes, or being caught by a fox. At the end of the loop, the fox made their move and it was back to the beginning.  The same game loop could be used for Tut-tut, though replacing foxes by mummies, carrots by gems, and so on.

For both Rabbit Run and Tut-tut, the game state is held in the display buffer. For example, to check the location the player wants to move to, you look up what is there in the display buffer. This is useful for saving both memory and time. In Tut-tut (and Rabbit Run) on the ZX Spectrum, objects are distinguished by colour. This makes it very fast to check what an object is by looking up its colour using the ATTRIB function (or PEEK-ing the right location in the display buffer). The Ace has a monochrome display, so this approach does not carry over immediately. However, the Ace display is very simple, formed from a two-dimensional array of characters, just like the attributes on the Spectrum is as two-dimensional array of colour values, and so it should be just as quick to look up the character code in the Ace’s screen memory as it is to look up a colour on the Spectrum. Thus, a crucial word to define in the Forth version of Tut-tut is SCREEN, which retrieves the character at a particular location in the level:

    : SCREEN ( X Y -- CHAR )
        SWAP 32 * + ( 32 CHARS PER ROW )
        9216 +  ( START OF SCREEN MEMORY )
        C@
    ;


For player movement, I decided to use the Rabbit Run core as the starting point for Tut-tut, though there were some differences. Surprisingly, Ace Forth does not include a CASE statement (which would allow a number of different program paths to be followed depending on the value of an input field—such as, a key-press or the object at a location). For example:

    ( X Y -- NEW_X NEW_Y )
    INKEY
    CASE
        ASCII P OF 1+ ENDOF            ( RIGHT )
        ASCII O OF 1- ENDOF            ( LEFT )
        ASCII A OF SWAP 1+ SWAP ENDOF  ( DOWN )
        ASCII Q OF SWAP 1- SWAP ENDOF  ( UP )
    ENDCASE


Sadly, there is no CASE word in Ace Forth, so the above code would not work. I investigated options to implement a CASE structure (a big selling point of Forth is the ability to add your own commands). However, while I found a few candidates on the Internet and in 1980’s magazines, none of them proved to be very effective nor reliable. I therefore decided to use brute force, writing multiple IF statements. This is an ugly approach though has proved adequate for Tut-tut.

Another weakness of FORTH (and, to a lesser extent, BASIC) is that it is difficult to define large input datasets—in this case, I was thinking about how to get the data for game levels into the game. In the BASIC version, David used DATA statements, RESTORE-ing to the correct line and then READ-ing the data for each level. However, FORTH does not have a DATA statement and the method for entering data described in the Ace manual is very laborious. In the end, I decided to bypass FORTH and to define the level data in binary code blocks to be loaded into memory inside suitable ALLOT’ed arrays. For example:

Tut-tut UDGs and character codes on the Ace.
    ( RESERVES 4,000 BYTES FOR LEVEL DATA )
    CREATE GAMELEVELS 4000 ALLOT
    GAMELEVELS 4000 BLOAD tut-tut.lev


There is a reasonable amount of logic involved in drawing each level in Tut-tut, as a level is stored in a compressed form to save memory. In the original ZX Spectrum version, a technique based on trios of character cells was use to reduce the memory requirements of a level by a factor of three. However, since finishing the BASIC version, David updated the compression strategy to one inspired by the GIF image format and described on his website [link]. This gives better compression and has been used in the ZX81 version to allow more levels to be added. Given that David planned to back-port his new compression algorithm to the ZX Spectrum, I decided to adopt the GIF-inspired approach for the Ace.

On the Ace version of Tut-tut, the logic for drawing a level is encoded in a word called DRAWLEVEL. Using Forth is an advantage here, as it excels at integer arithmetic, which is fundamental to how the encoding works. The only complication, for the Ace version, comes because I needed to remap the character values encoded in the (ZX81) level data onto the correct Ace character codes. For example, in David’s level encoding, the four sliding walls are represented by values 5, 6, 7, and 8. For the Ace version, I need to map these onto inverse-video ASCII characters 177, 178, 179, and 180. The same is true for the keys, gems, bracelets, and so on. This remapping of the character encoding represents the majority of the work of DRAWLEVEL, as you can see if you look at the source code.

As well as level data, Tut-tut also contains a reasonable amount of text for the instructions and splash screen, plus user-defined graphics. I also encoded these into two other binary code blocks, called MESSAGES and CHARSET, respectively.  CHARSET includes two sets of graphics. There are stylised versions of capital letters that overwrite the default bitmaps for these letters, the same as on the ZX Spectrum version, and a set of objects, held in character code 1—14 (except character 13, which is reserved for carriage return).

Otherwise, the port to Ace Forth was relatively straightforward (accepting I needed to brush up on my Forth skills). I tried to follow good Forth programming practice and to keep the most important game data (the position of the player plus temporary variables) on the stack.  This, and the fact that the state of the level is kept in the display memory, means there are relatively few variables needed: for score, air, keys, mummy locations, and a couple of useful flags to help in quickly exiting from the depths of program loops.

Some words involve a fair amount of stack acrobatics, which is a common trait of Forth programs. A particularly complex stack is required for the word CHECKLOCK (which moves a sliding wall, if possible). At one point, CHECKLOCK has a stack depth of 14 numbers, to hold the various permutations of player moving a sliding wall, not having the right key, and/ or a sliding wall being unable to move because of a blocking object behind it.

The word MOVEMUMMY also descends into some scary stack manipulation when the mummy needs to change direction. What was a relatively simple logic in the BASIC version, to make the mummy follow the player, proved particularly challenging in Forth, because I tried to avoid using variables as much as possible. MOVEMUMMY is the element of the program that I most struggled with, spending a good few hours debugging mummies that wandered off the screen or worse still teleported into other parts of the Ace’s memory, typically causing it to crash.

Talking about debugging, this was one of my bugbears with Ace Forth. The programming environment on the Ace is not typical for Forth. Most contemporary versions of Forth required the programmer to enter program source code into screens, which correspond to space reservation on disk (or tape). Manipulating screens was often a clumsy process, though it did mean the programmer could access and change any part of the program at any time.

Instead, on the Ace, you interactively develop the dictionary using : (colon), EDIT, and REDEFINE, creating the new words that make up your program in the active dictionary. If you need to fix a bug or change a word, you must first EDIT the word, which creates a second copy of the word at the top of the dictionary. Then, to get rid of the old version of the word and update any references to the old definition, you must remember to REDEFINE the word, otherwise you can quickly end up with confused dictionaries with multiple versions of a word in use. Because the dictionary is a stack of words, if you forget to REDEFINE a word after changing it, and then define further words, you end up trapped in a situation where you cannot remove the out-of-date version of the word nor can you update the definition of any other words that link to that out-of-date version. The only work around is to FORGET everything that you did afterwards and then re-enter the lost words. On my first attempt at Tut-tut, I fell into this trap on several occasions, and ended up with a hopelessly corrupted dictionary with stale links that made the game unstable.

Eventually, it became clear I needed to start again, from scratch. This was not all bad, as it gave me the opportunity to fix some wrong decisions I had made in that first attempt. I suspect that when writing a program on the Ace, this was a relatively common requirement. Unless you have a very thorough design, the first attempt at a program was likely to end up as a prototype, because once you had moved on from a word definition, you could not go back.

Debugging is not a strong point for Ace Forth (nor Forth, in general). The common trick from the 1980s (because no one does that now!) of adding print statements at key points in a program is slightly more tricky in Forth, as you have to make sure not to affect the state of the stack. The Ace User Guide has a useful word, named .S, which prints out a full copy of the stack without affecting it. I took .S and extended it a little, so that the stack is printed on the first line of the display (a line that is not used in Tut-tut):

: .S ( -- ) ( PRINT STACK )
  15419 @ HERE 12 + ( FIND THE TOP AND BOTTOM OF THE STACK )
  OVER OVER – ( IF TOP = BOTTOM, WE ARE DONE )
  IF
    DO
      I @ . 2
    +LOOP
  ELSE
    DROP DROP
  THEN
;

: .T ( PRINT STACK ON ROW 0 )
  0 0 AT 32 SPACES ( CLEAR ANY PREVIOUS TEXT )
  0 0 AT .S
;


Otherwise, debugging typically meant studying the source code and manually tracking the changes to the state of the stack after each line. It was sometimes quite laborious; though I noticed, as the game developed, I tended to make fewer mistakes, so suspect my Forth competence was growing. I also found useful tips by looking at other people’s code, especially some of the old magazine listings archived on www.jupiter-ace.co.uk, as well as the Ace ROM disassembly [link].

The full listing of Tut-tut is available on GitHub [link]. There are four files. The main file, called ‘tut-tut.fs’, is the Forth source for all of the words, including constants, arrays, and a small amount of machine code. The other three files contain the level data ‘tut-tut_levels.asm’, the help text ‘tut-tut_messages.asm’, and the user-defined graphics ‘tut-tut_charset.asm’. These need to be assembled using a Z80 assembler, such as Z80ASM [https://savannah.nongnu.org/projects/z80asm], to create binary files that can then be inserted into the memory on an Ace emulator, such as EightyOne; into arrays called GAMELEVELS, MESSAGES, and CHARSET, respectively, which have been pre-allocated appropriately.

The process for inserting the binary blocks is a little involved, so I outline it here for GAMELEVELS.

1. First, assemble the source file ‘tut-tut_levels.asm’ and make sure to write a label file, so you can work out how big the binary block is. Using Z80ASM, the following command would do the trick:

z80asm –L –o tut-tut_levels.bin tut-tut_levels.asm

The block is assembled to address 0x0000, though this is not significant. If you print the labels, you should see a label END, which is used to work out the length of the block. At the time of writing, my test version has three levels and END is reported as 0x017D (or, decimal 381).

2. In your Ace emulator, with your in-progress Tut-tut dictionary loaded, create some space for the game levels, with:

CREATE GAMELEVELS 381 ALLOT

—substituting the right value for the length of the block.

3. Check where GAMELEVELS is located in memory, using

GAMELEVELS .

—and use the address returned as the start point to which you load the block—for example, using [File] [Load Memory Block] on EightyOne.

4.    If necessary, remember to:

REDEFINE GAMELEVELS

—if you have a previous version of the array earlier in the dictionary.

I hope you will agree that the Ace version of Tut-tut is a reasonable tribute to David Stephenson’s original and that you will consider attempting to type in the game. I never found a way to automatically output the program from EightOne, so tut-tut.fs has been transcribed by hand. This means I have almost certainly made some mistakes—just like back in the 1980s!

Having written the game, I have come to like Forth a little more, and I have developed a fondness for the Jupiter Ace. Richard and Steven were right that a micro powered by Forth is better able to run software without the need for machine code and I suspect I would indeed have produced more useful programs if I had discovered Forth in the 1980s. I like to think I would have been happy had I owned a Jupiter Ace rather than a ZX Spectrum, when I was younger. However, I suspect I would have been envious of my Commodore- and Spectrum-owning friends and would have missed classic games like Jet Pac and Manic Miner too much.


Read More

Tuesday, May 05, 2020

TuT-TuT on the Jupiter Ace: Part 1

Leave a Comment

Exciting news this week as Tut-Tut launches on the Jupiter Ace: As a special treat to celebrate, guest blogger George Beckett takes us through his journey in porting the game to the Forth Language an onto the Jupiter Ace.

George has spent the last few months converting the original BASIC source listings and some of the latter adaptations made for the ZX81 and 2020 Spectrum versions of the game.

Join us for a new series of articles as we dig up an ancient micro treasure and explore the depths of game conversion.


Evolution of Tut-Tut: ZX Spectrum BASIC, ZX81, ZX Spectrum 2020 Edition, Jupiter Ace.

Porting TuT-TuT to the ACE

Towards the end of August (2019), David Stephenson (a.k.a. zx81adventures) started posting screenshots, on Twitter, from a new ZX Spectrum game that he was working on. The previews showed an arcade, maze game with bright, clear graphics and an Ancient Egyptian theme. What made the game stand out was that David was using Sinclair BASIC to write the entire game: it was to be a type-in game, harking back to the 1980’s home computing scene, when it was not uncommon to invest many hours into typing in, debugging, and playing such games. Given Sinclair BASIC’s sluggish performance and appetite for consuming memory, David needed to employ some careful tuning and compression tricks to achieve reasonable speed from, and to fit the game into, the rubber-keyed 48k Spectrum.

Very Early BASIC version of Tut-Tut on the ZX Spectrum.
The game, called Tut-tut, was finally published in the online retro-computing magazine Paleotronic in early November [link], along with a YouTube review and taster from Villordsutch [link]. Those who did not want to type in the game could download a copy from Paleotronic’s website. However, the download included a subtle warning that it was not quite complete: If you wanted to be sure of having the full game, you needed to invest the time to type it in yourself.

Tut-tut had some similarities to a very rudimentary game I had made, called Rabbit Run, as part of a series of articles I had written on programming for the Spectrum Show Magazine (issues 16—26) [link]. I had produced a few different versions, including several BASIC versions, a machine-code version, and—a little more unusually—a version written in Forth. The Forth version of Rabbit Run worked surprisingly well, being similar in speed and size to the machine code version, though being much quicker to write.

I started to think about revisiting my Forth version of Rabbit Run and using it as the basis for a port of Tut-tut. However, rather than write it for the ZX Spectrum, I decided I would try to write it for the Jupiter Ace, a less well-known British micro from the early 1980s that was unusual in that it had Forth as its built-in language, rather than the ubiquitous BASIC.

The Ace was developed by Richard Altwasser and Steven Vickers, who had been designers at Sinclair Research until they left to form their own company called Jupiter Cantab. The Ace was their first (and only) computer, and was launched in 1983. The Ace had much in common with the ZX81, which almost certainly inspired it but, by using Forth instead of BASIC, the limited RAM (2 kilobytes, built-in, usable) was much less of a constraint than had been the case for the ZX81.

Source - https://k1.spdns.de/Vintage/Sinclair/80/Jupiter%20Ace/Advertisements/
Sadly, while Forth was compact and efficient, its more primitive functionality and idiosyncratic syntax (based on Reverse Polish notation [link]) put people off, and the machine only ever sold a few thousand units. Also, the arrival, soon after, of Sinclair’s next micro, the ZX Spectrum, which for similar money gave you 16kb of RAM and full-colour, high-resolution graphics would have made the Ace look a poor proposition.

The demise of the Ace signalled a change in the way people viewed home computers. The hobbyists and electronics tinkerers of the 1970s had been replaced by a new breed of users who wanted to play arcade-like games and do useful things such as organise their accounts or run small businesses. The Ace, which was billed as “the programmer’s computer”, arrived on the scene too late, after most micro hobbyists had moved on.

I missed out on the Ace, in the early 1980s, instead being lured by the pull of the ZX Spectrum. However, I probably spent at least as much time trying to program my Spectrum as I did playing games. I soon outgrew BASIC, so spent much of my time wrestling with machine code and crashing my computer. Perhaps if I had started out with an Ace rather than the Spectrum, my programming would have been more fulfilling (if a little less colourful). In an attempt to find out if this was the case, I downloaded an Ace emulator (EightyOne), purchased a copy of the 35th-anniversary Ace User Guide, and set to work on a new version of Tut-tut.

Tut-Tut on Jupiter Ace.
The finished product is available from GitHub [link] as either a TAP file to be used in an emulator, such as EightyOne, or a source code that you can type in and modify, consisting of a Forth program occupying around 4kb once compiled and three assembly language files, which hold various game data to be assembled and loaded into the Forth program as binary code blocks.

While based on David’s Sinclair BASIC version, the Ace version uses the newer levels from the ZX81 version and, thanks to some help from David, includes the extra features such as bracelets, amulets, and a hidden treasury for the final level.

The game requires roughly 12kb of memory, so if you are lucky enough to own a real Jupiter Ace, you will also need a 16kb RAM pack as well. Alternatively, you could buy and build a Minstrel 4th [link], a modern day Z80 microcomputer that is compatible with the Ace and can run Tut-tut without any problems.

In the next blog post, I will provide some insight into how the game is written in the hope it will encourage some to have a go at typing in the game rather than loading it from a tape file. However, for now, I suggest you power up your Ace (or Minstrel 4th), or install an Ace emulator, and get on with some Egyptian-themed adventuring.


Read More